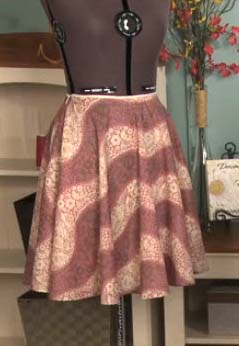
 You’d be surprised how easy it is to whip up a cute and summery circle skirt with just a few basic tips and a pattern that you can customize to your measurements. Follow these instructions to create your own circle skirt pattern, and then check out the video below for tips on how to put your garment together!
Related Video: How to Make a Circle Skirt
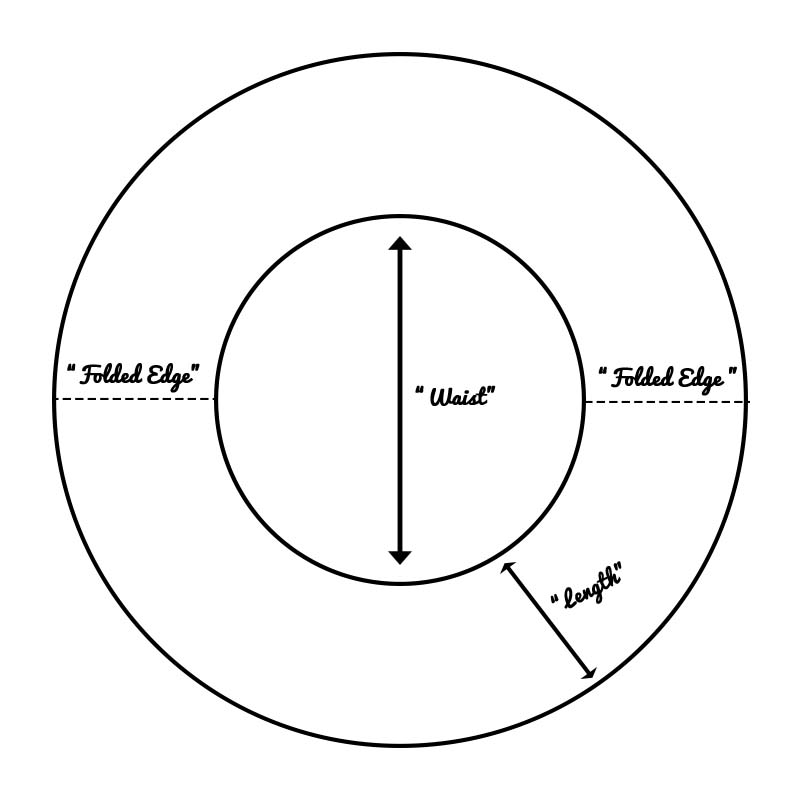
Step 1: First, measure your waist or where you would like the skirt to sit near your waist or hips. Record this as your “waist measurement.”
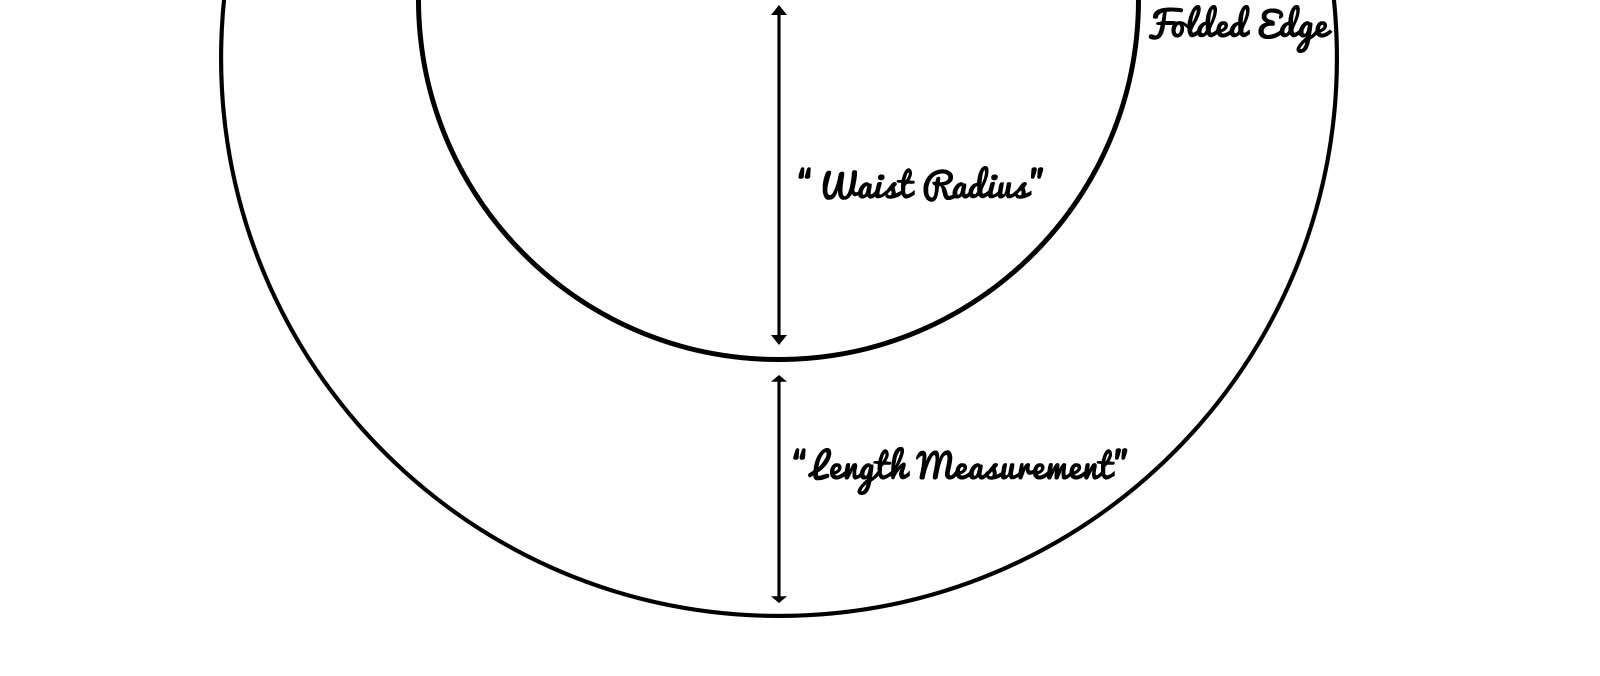
Step 2: Next, measure from where you took your waist measurement to where you would like the bottom of your skirt to end, record this as your “length measurement.”
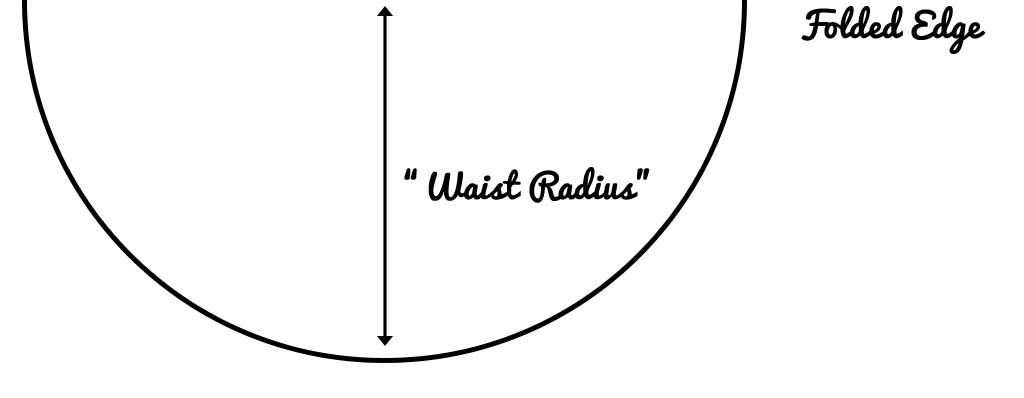
Step 3: Now for a little math: Take your “waist measurement” and divide by 3.14 (pi), then divide that number by 2. Record this as your “waist radius” measurement.
Step 4: If you are constructing a pattern piece out of pattern paper, place the paper on a flat surface. If you are drawing the pattern directly onto your fabric, place your fabric on a flat surface with the fold at the top. This will make drawing the lines easier.
Step 5: Tie a length of string to a marking pen or pencil. The length of string, after it is tied to the marking utensil, should be the length of the “waist radius.”
Step 6: Place the loose end of the string along the folded edge of your fabric or long edge of your pattern making paper. If you are comfortable with this process, and your fabric is not too light-weight that it will move around, you can simply hold the string in place. If not, secure the string with tape or pins.
 Step 7: Stretch the string until it is taut, and then move the marking utensil back and forth until you have drawn a nice semi-circle.
 Step 8: Tie another length of string around your marking pen, this time the string should be the “length measurement” plus the “waist radius.” Pull the string out taut and then move back and forth to create another semi-circle.
 You now have your circle skirt pattern piece! Cut out the semi-circle piece, and then cut along one folded area, either all the way or the length of the zipper you plan to insert.
Happy sewing!
Related Video: How to Make a Circle Skirt
Get in touch! Leave a comment or email editor@nationalsewingcircle.com

I am also a Gold Member, I need help with following a pattern, I would love to make the circle skirt but it doesn’t say how much material I need or a pattern, please help me with this situation. I would like to find other easy patterns like culottes to make if you can. Thanks so much
What adjustments would you make if you wanted an elastic waist and no zipper?
I have no comment I just started.
Want to know how to make a skirt pattern
Thank you for the pattern, it is quick and you can style it many ways
I am also a paid member why am I requested to fill this information out for you?
So this a part for site?
I have been a Paid member for quite some time and I'm always gettingpop ups and then sometimes I can't get them to go away! When we are to download a pattern, I get a pop up telling me I have to buy a PDF program - I already have a private one that works very well. PLEASE if we pay for your to membership can't you ensure we have an enjoyable and uninterrupted time with sewing and NOT getting so frustrated with pop ups asking us to buy more when we've already paid!
I'am very happy to find us
I used to make these skirts for myself years ago but wrap a round style. Easy to make and wear! Very useful when I was pregnant as the waist grew with me :)