Are you overwhelmed by a cluttered sewing room? Does the sheer volume of fabric, thread, and tools leave you feeling disorganized and frustrated? Don’t worry, with a little planning and effort, you can transform your sewing space into a place that makes you feel creative and not stressed. In this article, we’ll share practical tips and tricks for organizing your sewing supplies, from fabric storage to bobbin management. Discover how to declutter your workspace, maximize storage, and create a sewing environment that inspires your projects.
1. Fabric Folding & Organizing Tips for Storage or Travel
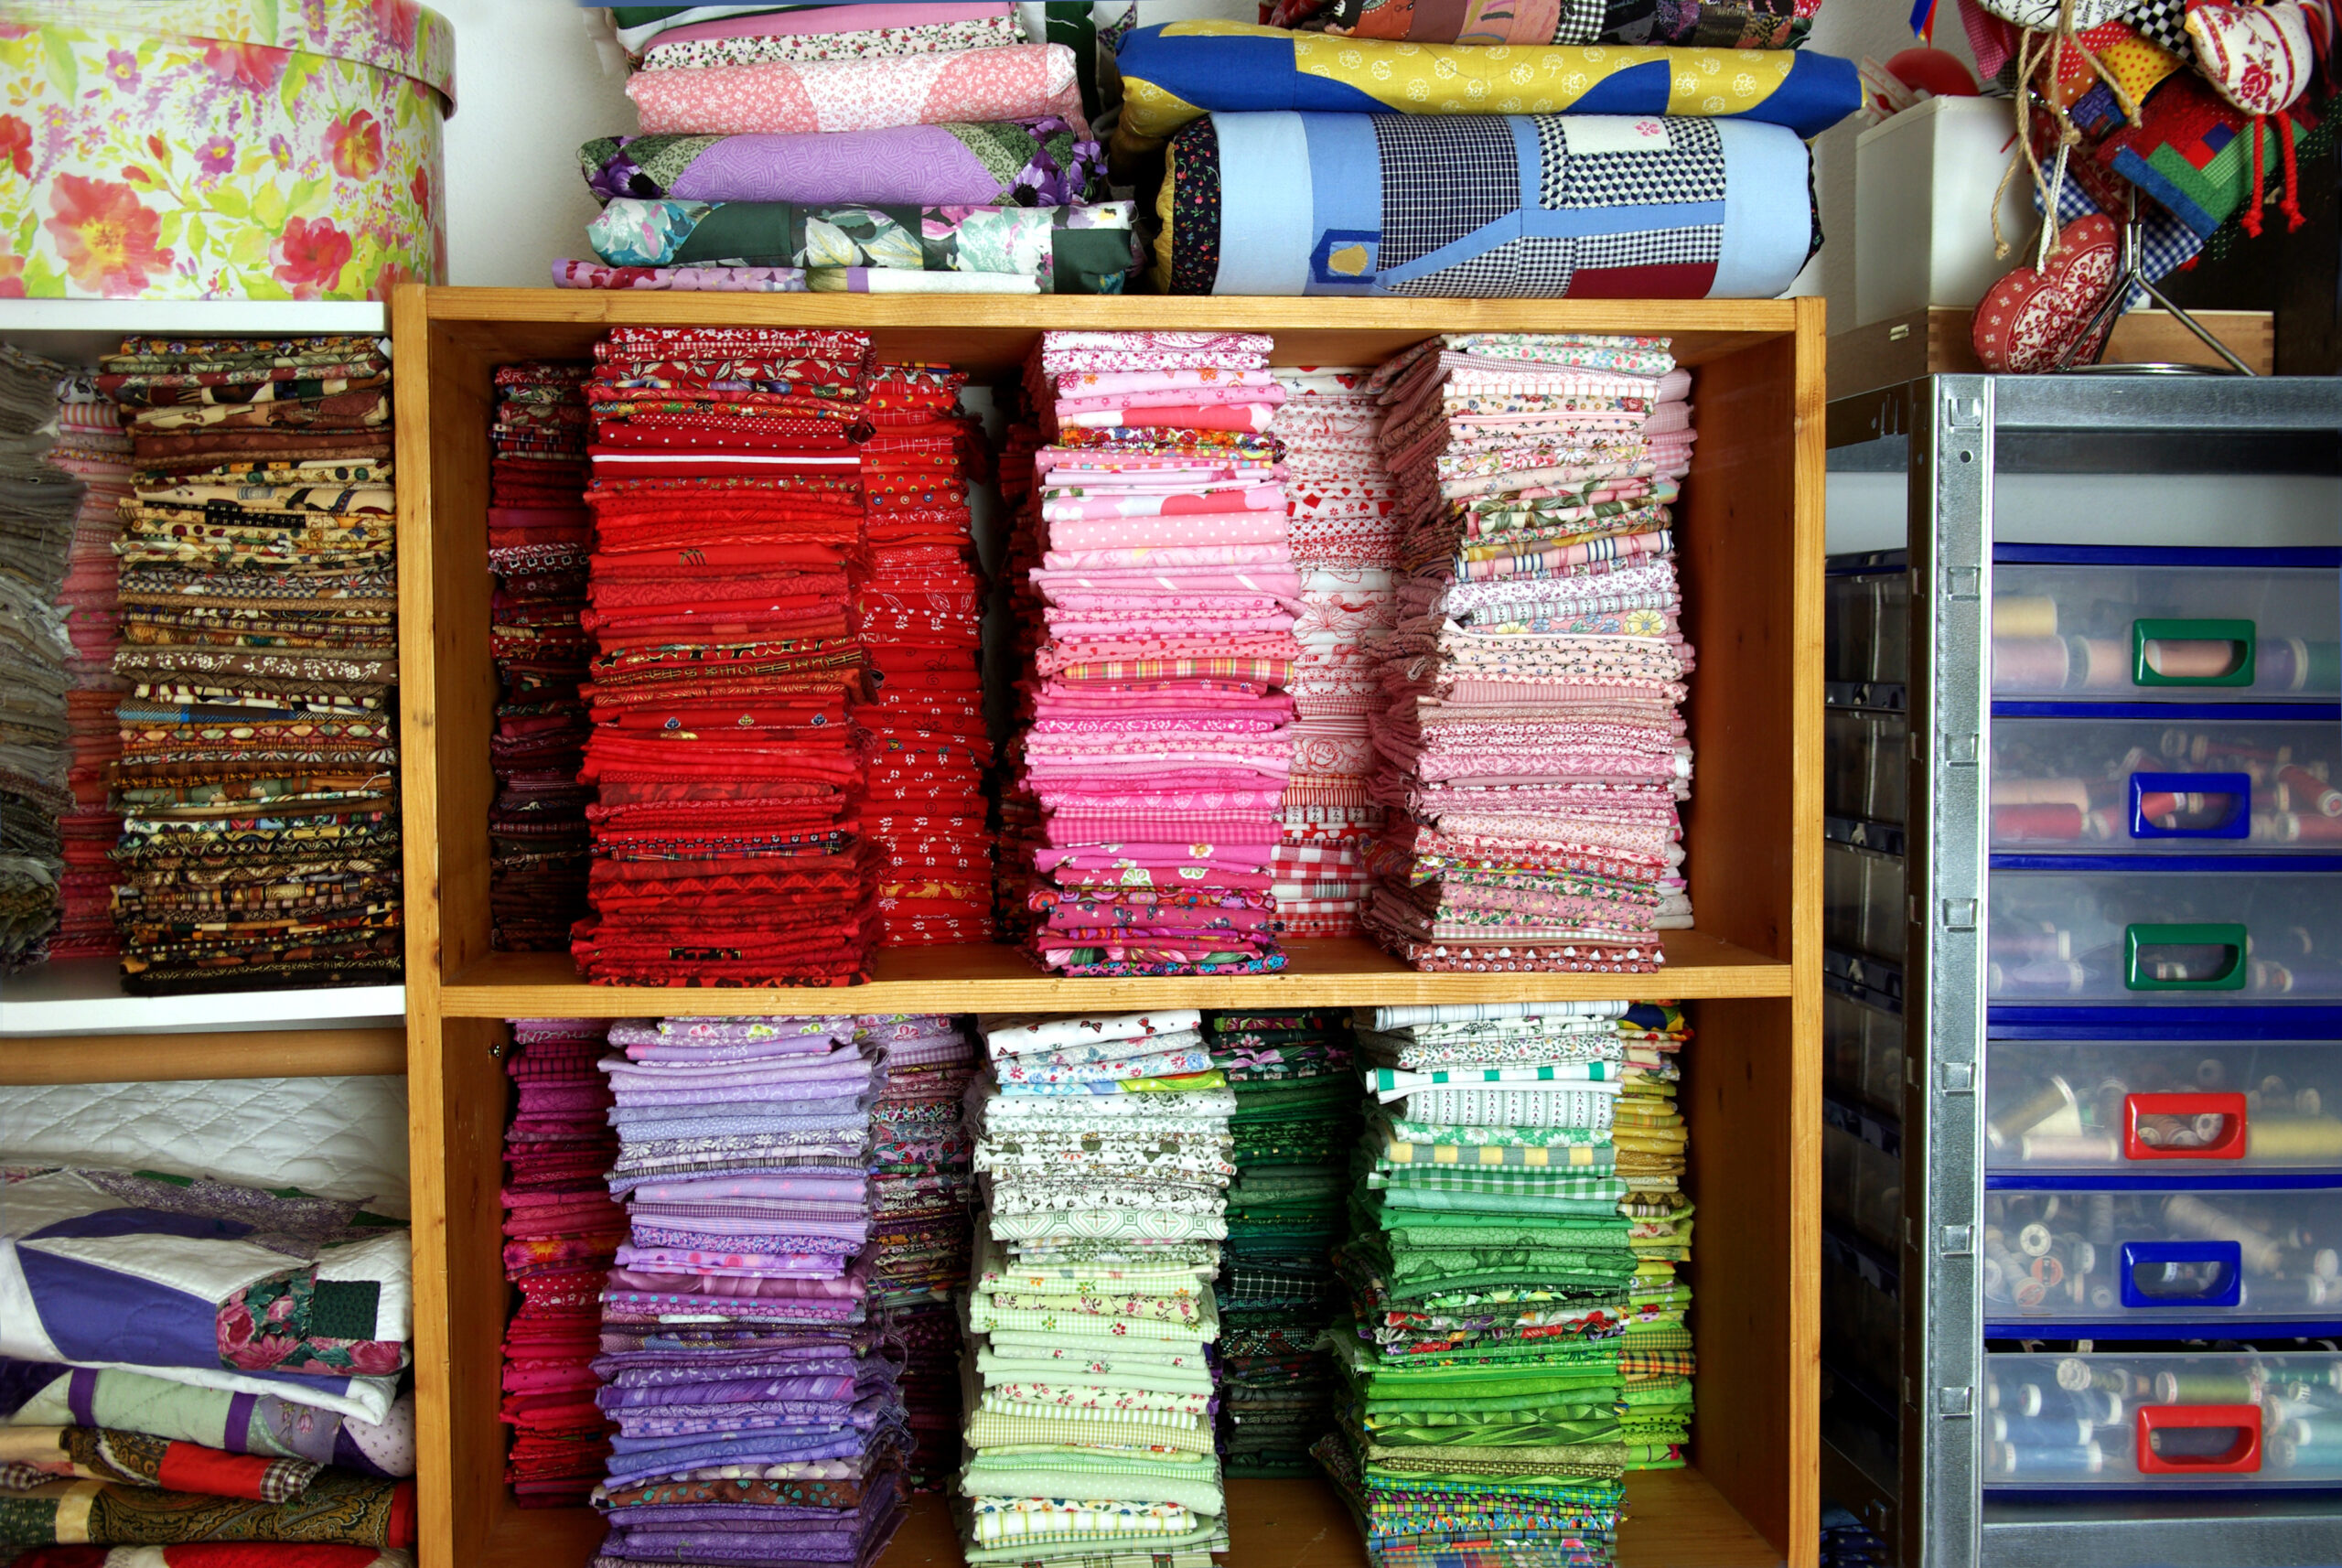
Efficient fabric organization is essential for any sewing enthusiast. Beyond keeping materials neat and tidy, being able to easily visualize your fabric options is crucial. While stacking fabric on shelves is common, it can be challenging with various sizes and types. Getting in the habit of folding your fabric will help you keep it organized and ready for sewing! When you bring new fabric home from the store, it is often piled up and not folded neatly. Once you take your fabric home, take it out and refold it neater. Fold the fabric half lengthwise, then in half again. Depending on the size of your fabric you can either quarter it or third it into a small rectangle and smooth it out! While each piece of fabric may not fold to the exact same size, keeping them fairly even and equal will help make them easier to stack and less likely to fall over.
2. Sewing Room Organization Tips: Index Cards
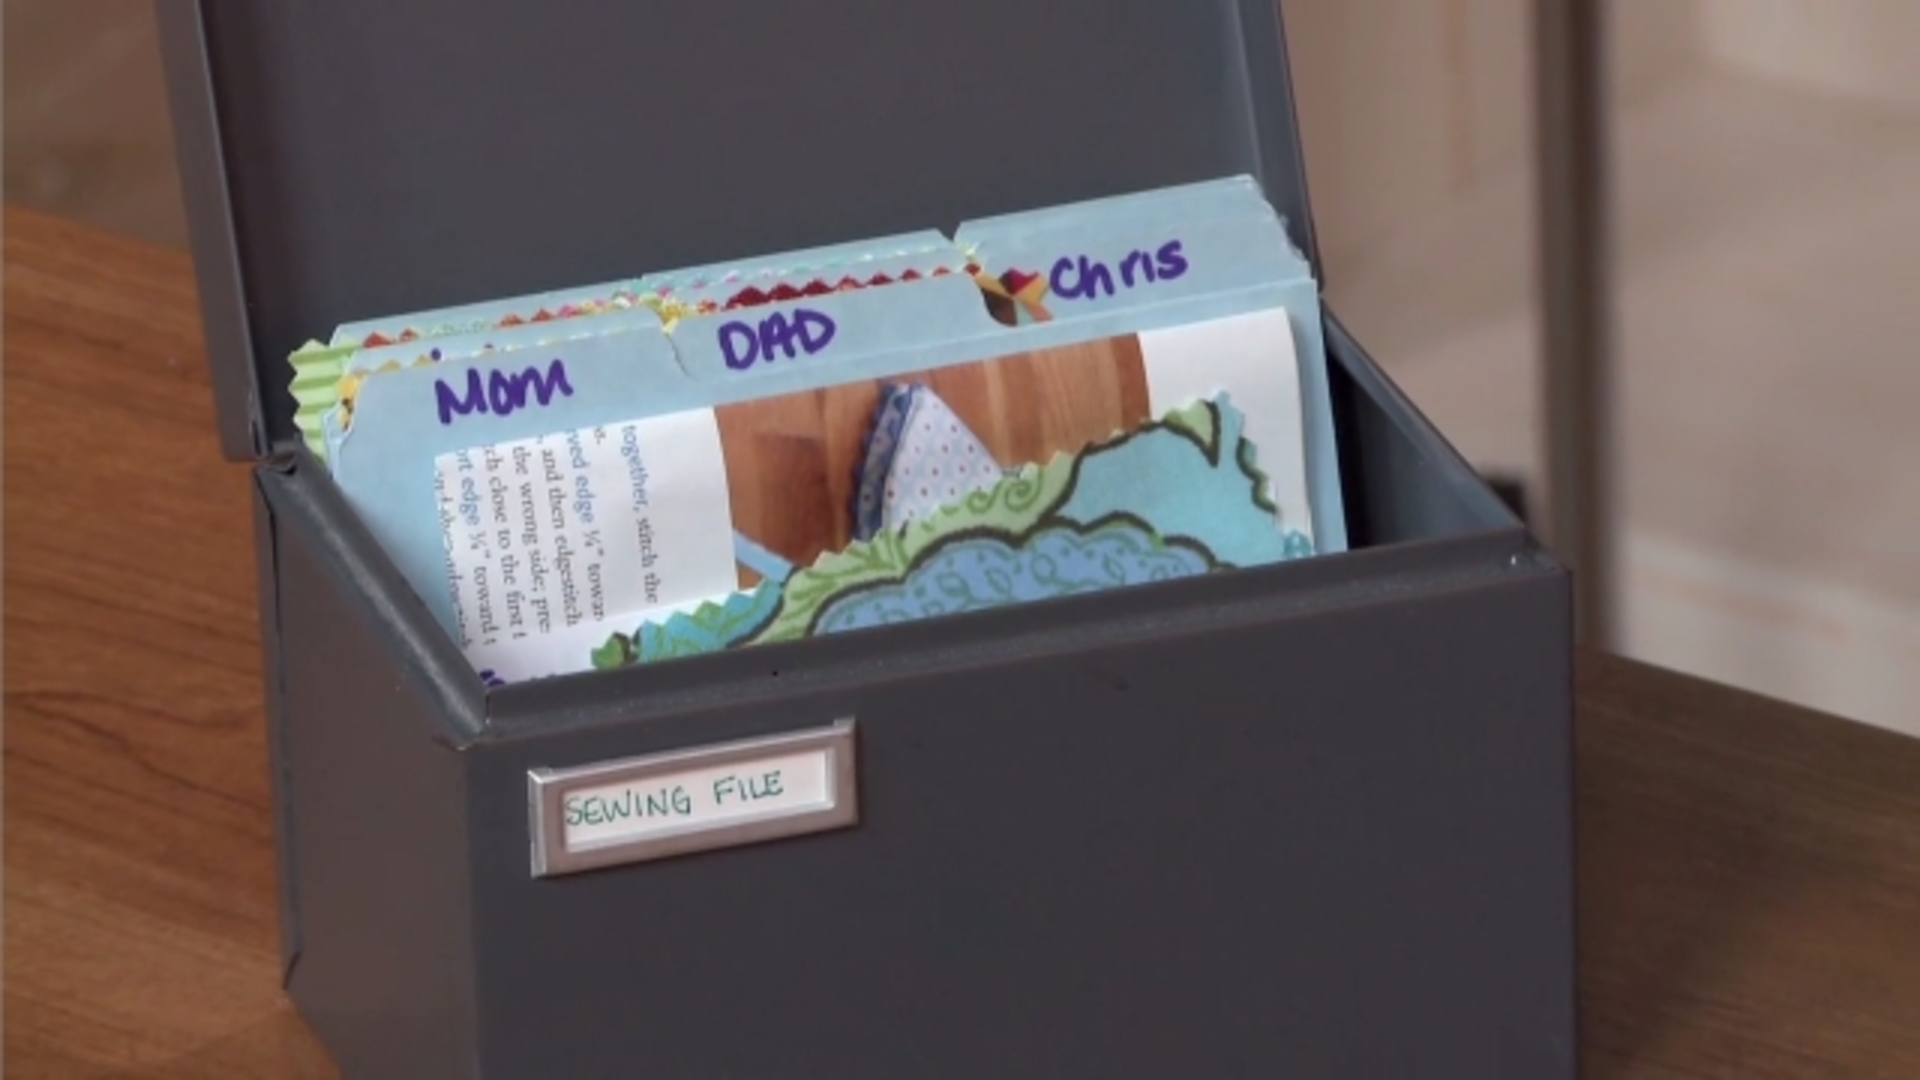
If you make a lot of homemade gifts this tip is great for you! Keep track of all your handmade items with index cards for your future reference and planning. On each of your index cards you can keep a record of what you’ve already made for each person, along with samples of fabric that they like, or you plan to use on their gifts. Throughout the year, take the time to write down ideas for handmade gifts, or store pattern photos with each index card. Then, when it’s time to sew, you can remember patterns or ideas you’ve collected over the years.
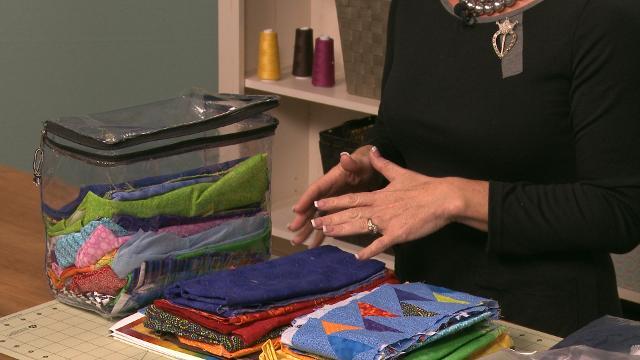
3. Tip for Color-Coding Your Sewing Supplies
This clever tip, originally designed for organizing stabilizers, can be adapted to streamline your storage of other sewing supplies. By using colorful scrunchies, you can quickly and easily identify the contents of each bundle.
Simply select the supplies you want to color code and assign a specific color to each type. For example, in the video above Leah Rybak uses red scrunchies for heat-removable stabilizer, blue for iron-on, pink for cutaway, and green for water-soluble. This color-coded system allows you to group similar supplies together and effortlessly locate the exact item you need with just a glance.

4. Organizing Your Machine Stitches

When you bring home a new sewing machine, it’s important to explore its capabilities and familiarize yourself with the various stitches it can create. Consider taking a class offered by your sewing retailer, as they often provide in-depth training on specific machine models. While some classes may be free, others might require a small fee, but the investment is well worth it. Classes will help you stay organized and informed about your machine’s functions by creating a stitch sample binder with you. But if you don’t have access to a class, you can still (and should) do this on your own! Sew each stitch type on your machine and save a sample, along with the corresponding machine settings and fabric recommendations. You might be surprised by the hidden talents of your machine! Experimenting with all the stitches will help you fully understand its capabilities and make the most of your investment.
5. Refolding Tissue Paper Patterns
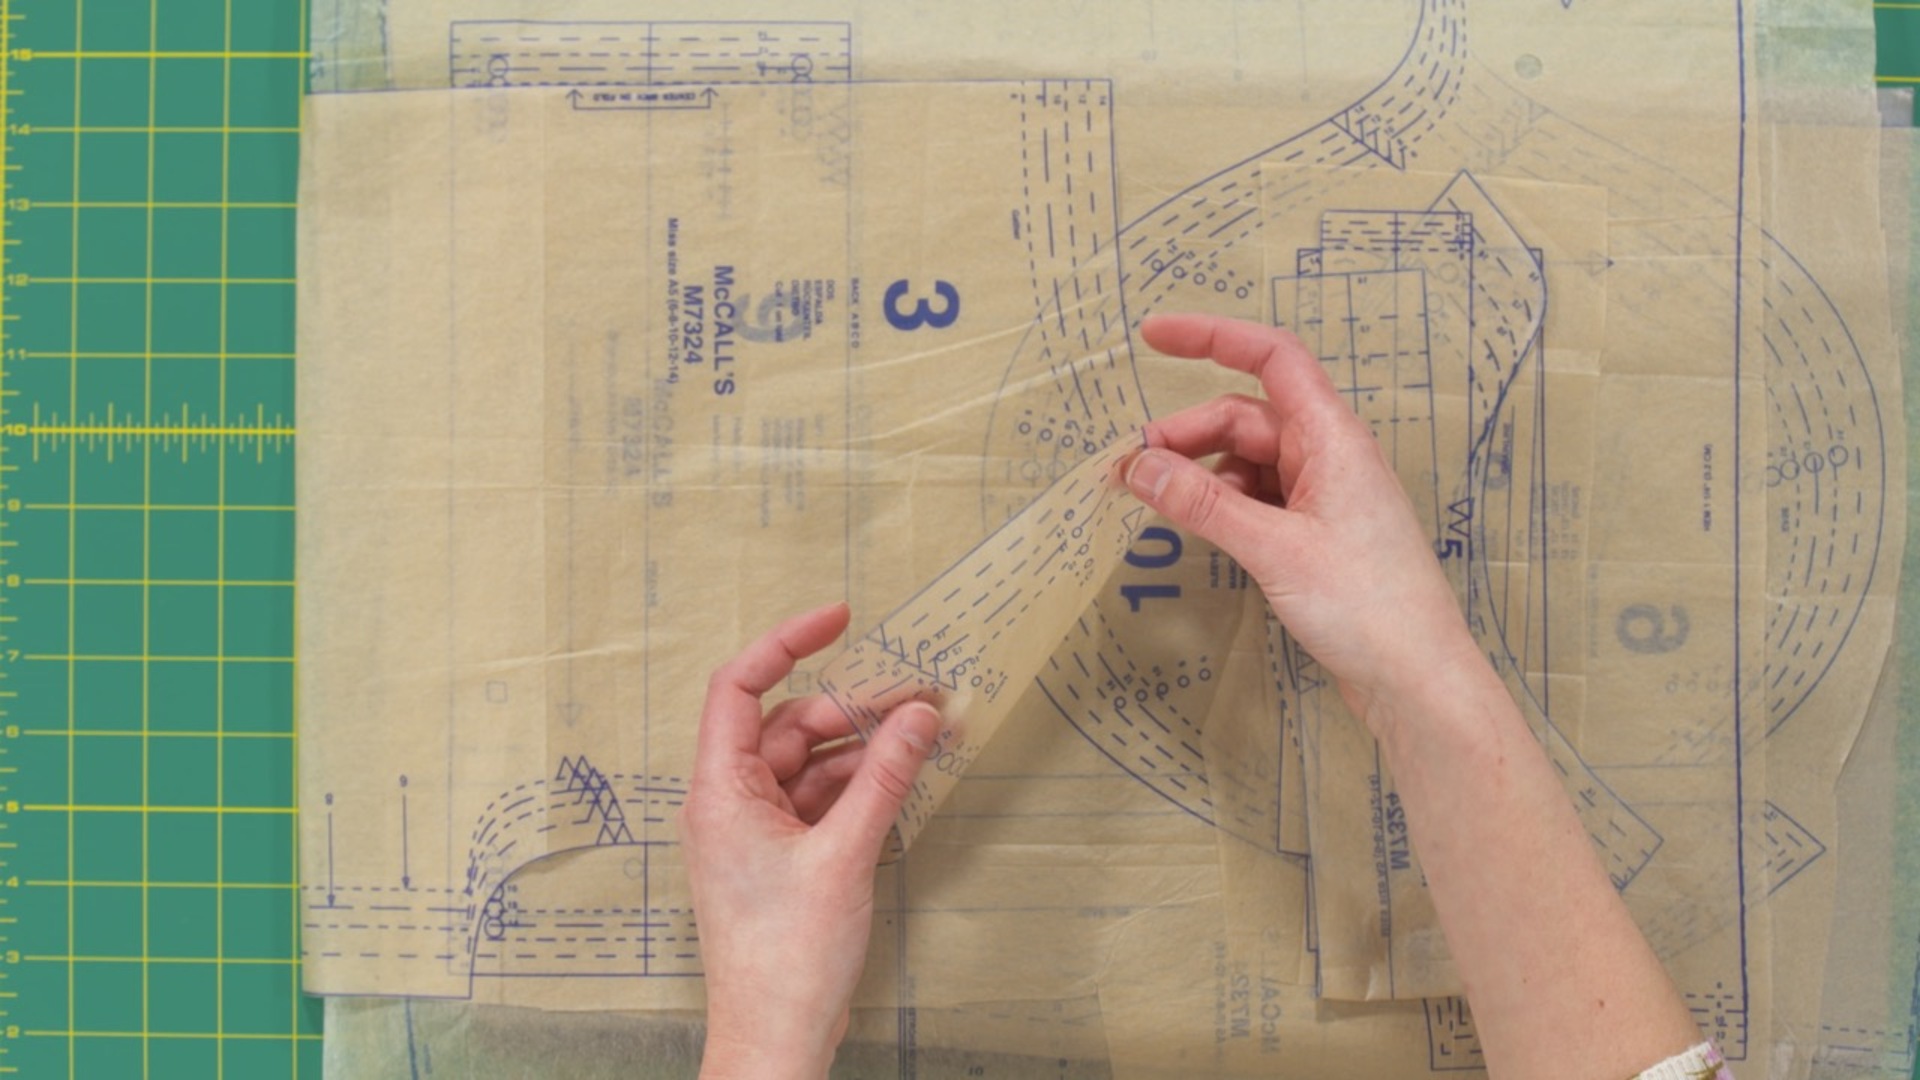
After removing the tissue paper patterns from a commercial pattern envelope, it is often difficult to get them refolded in a way that will fit back into the envelope neatly. With this trick, you will be able to tidily refold and store the used tissue paper patterns in the pattern envelopes. All you need is an iron! When using this technique, be sure the iron is on a low setting with no steam. Always test the iron against the paper first to be sure the temperature is not too high. You will want to layer the tissue paper pattern pieces and fold them gently to protect the edges, pressing the paper with the iron gently to flatten them and create sharp creases. When the stack of paper is folded into a shape that will fit back into the envelope, simply slide the tidy stack inside for storage. When removing the pattern for reuse, be sure to press it flat to iron out the creases. Use this trick again and again to eliminate bulky and torn pattern envelopes.
6. Organizing Sewing Notions

To maximize efficiency and minimize frustration in your sewing space, consider these organization strategies:
Storing Patterns:
•Envelope Storage: For store-bought patterns, place the envelope, pattern, and any accompanying notes or notions in a gallon Ziploc bag. Store the bag in a tote or drawer or hang it from a closet using a hole punched at the top.
•Rolled Patterns: For traced patterns, roll them up and secure them with a hair tie or rubber band. Label the roll with pattern details and store it upright in a tote to prevent creasing.
Storing Fabric:
•Vertical Storage: Fold fabric and store it stacked vertically, like files in a filing cabinet. This allows for easy visibility of fabric edges.
Storing Thread & Bobbins:
•Tackle Box Organization: Use a fishing tackle box to store thread spools, separating them by color using the dividers.
•Bobbin Storage: Secure bobbins to matching thread spools with a hair tie or rubber band to prevent unraveling and keep them together.
By implementing these tips, you can create a well-organized sewing space that promotes productivity and creativity.
7. How to Store Bobbins
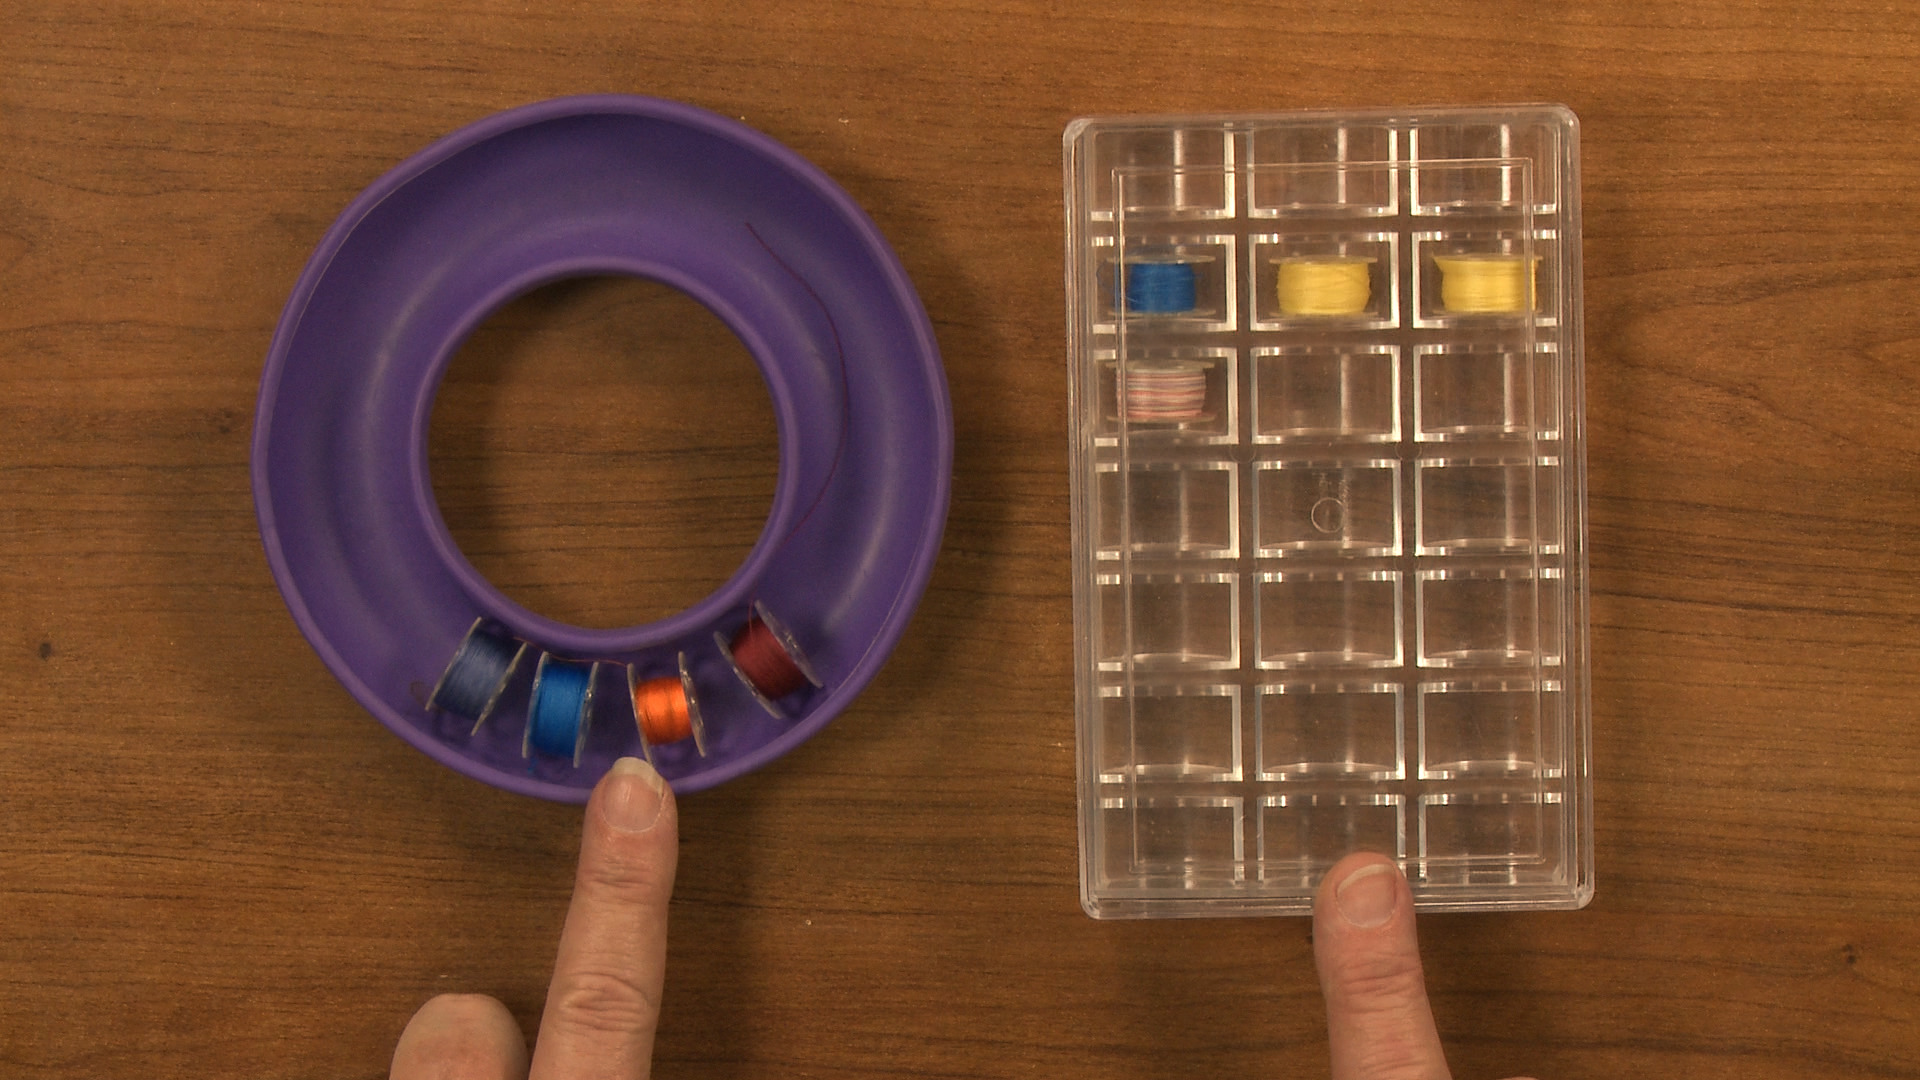
There are various options for storing bobbins, both available for purchase and repurposed from household items.
Flexible silicone rings, available in different sizes to accommodate various bobbin sizes, provide a secure and convenient storage solution. Ensure a snug fit to prevent bobbins from falling out. Hard plastic cases, on the other hand, can store any size of bobbin and are ideal for grouping similar thread colors or types.
For a more budget-friendly option, consider repurposing household items. Large medicine cases offer secure storage for multiple bobbins and are often transparent for easy viewing. Used tea tins also provide a compact and secure storage solution for bobbins, both at home and on the go.
By implementing these organization strategies, you can create a sewing space that is both functional and aesthetically pleasing. A well-organized workspace will not only streamline your projects but also inspire your creativity. Remember, the key to a successful sewing room is finding a system that works for you. So, take the time to experiment with different methods and tailor your organization to your unique needs and preferences. Happy sewing!
Looking for more? Our sister site National Quilters Circle has some great tips you might be interested in:
Organizing Your Sewing Room Part 1: Thread & Bobbins
Organizing Your Sewing Room Part 2: Fabric
Organizing Your Sewing Room Part 3: Quilting Tools
Organizing Your Sewing Room Part 4: Kits & Projects
How to Store Quilting Supplies
Fortunately I have a dedicated sewing room. Unfortunately it's not very large and I have a lot of items. One thing I have found very useful, because I have to stack plastic containers, is the use of floor dollies. That way I can put the boxes in front of my shelves and when I need what's behind them they and their contents are easy to move out of the way and back.
I use the plastic containers that are clear used for fresh fruit or veggies which are prepared with vents to keep my different square cuts or long ones in fabric1a pieces cut for use in different ways as storage. The pieces don’t get mussed up or stretched out of shape. I use these so much and they stack beautifully.
file paterns according to type or person that you sew for..
Thanks